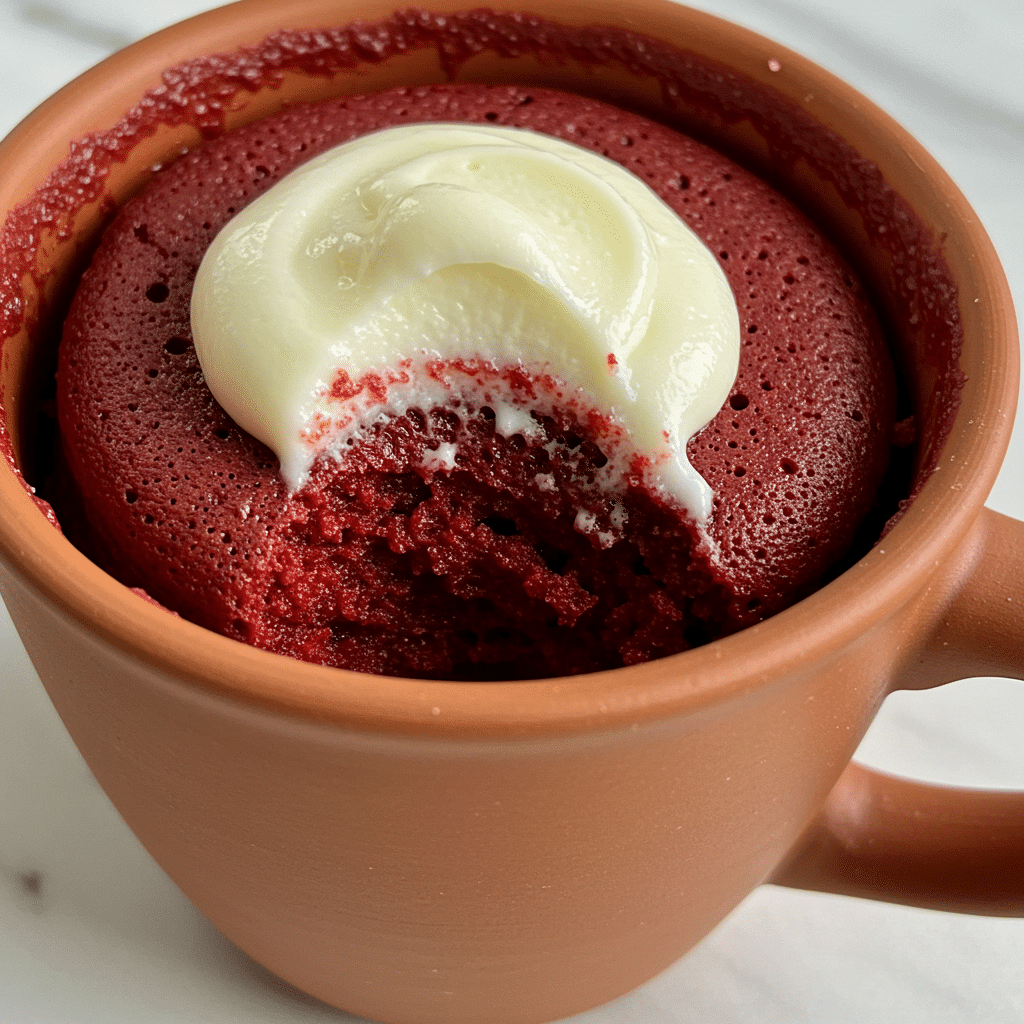
When midnight cravings strike, nothing beats a red velvet mug cake that’s ready in under two minutes. Additionally, this microwave red velvet mug cake delivers the classic tangy-sweet flavor and gorgeous crimson color of traditional red velvet cake without the fuss of a full-sized dessert. Furthermore, busy home cooks love this single serving red velvet cake because it satisfies dessert cravings instantly. Whether you’re new to mug cake magic or a seasoned microwave baker, this easy red velvet mug cake recipe transforms simple pantry ingredients into bakery-worthy indulgence. Moreover, you’ll discover foolproof techniques that prevent common mug cake disasters while creating the perfect moist red velvet mug cake every time.
Table of Contents
My Red Velvet Mug Cake Discovery: From Kitchen Disaster to Microwave Magic
Hey! I’m Emma, a 37-year-old home cook from Asheville, NC, here for all you busy bees who crave something warm, tasty, and made in a mug. My journey started with late nights, tight budgets, and a microwave I used more than my coffee maker. One failed pasta sauce (RIP saucepan) led me to the world of microwave mug meals—quick, creative, and shockingly satisfying. From breakfast scrambles to fudgy brownies, I’ve made it all in a mug, often with a toddler nearby or the dog barking at shadows. Great food doesn’t need fancy tools—just curiosity, a microwave, and maybe your favorite playlist. Let’s zap, stir, and savor one mug at a time!
Three years ago, I stumbled into red velvet mug cake territory during one of those evenings when my sweet tooth demanded immediate attention. Initially, I’d been attempting a traditional red velvet layer cake for my sister’s birthday, but the recipe called for ingredients I didn’t have and patience I’d lost hours earlier. Consequently, I found myself staring at my microwave, wondering if I could create that signature tangy sweetness in a single mug.
My first attempt at this microwave red velvet mug cake looked more like a science experiment gone wrong than anything edible. Nevertheless, after several tweaks and many taste tests, I discovered the secret to achieving that perfect balance of chocolate undertones and cream cheese tang that makes red velvet irresistible. Now, this easy red velvet mug cake has become my go-to when I need comfort in under two minutes.
What makes this red velvet mug cake recipe special isn’t just the speed—it’s the way it captures every element of the classic dessert in a perfectly portioned single serving. Furthermore, unlike traditional recipes that require multiple bowls and lengthy baking times, this approach delivers authentic red velvet flavor with minimal cleanup. The vibrant red color, tender crumb, and subtle cocoa notes all translate beautifully into mug cake form, proving that great desserts don’t always require great effort.
Why Red Velvet Mug Cakes Work So Well
The magic of red velvet mug cake lies in how microwave cooking enhances the dessert’s signature characteristics. Specifically, the quick cooking method preserves the cake’s moisture while intensifying the tangy flavor profile that makes red velvet unique. Additionally, the small batch size means you can experiment with different red velvet mug cake variations without committing to an entire cake.
Unlike my experiences with chocolate mug cakes that sometimes turn dense, red velvet’s acidic components create a naturally tender texture in the microwave. Moreover, the cream cheese element that defines red velvet translates perfectly into a quick mug cake format, delivering that distinctive tang in every bite.
The Science Behind Single-Serving Success
Creating the perfect moist red velvet mug cake requires understanding how ingredients behave in microwave cooking. First, the acid in buttermilk and vinegar reacts with baking soda to create lift and tenderness. Then, the cocoa powder provides depth without overwhelming the delicate vanilla notes. Finally, the food coloring ensures that gorgeous crimson appearance that makes red velvet so visually striking.
This scientific approach eliminates the guesswork from red velvet mug cake creation. Subsequently, you’ll achieve consistent results every time, whether you’re making this recipe for a quiet evening treat or impressing guests with creative mug cake variations.
Essential Ingredients and Perfect Red Velvet Mug Cake Technique
Mastering the red velvet mug cake recipe starts with understanding how each ingredient contributes to the final result. Therefore, let’s break down the essentials that create that signature red velvet experience in microwave form.
| Ingredient | Amount | Purpose |
|---|---|---|
| All-purpose flour | 4 tablespoons | Structure and texture |
| Granulated sugar | 3 tablespoons | Sweetness and moisture |
| Unsweetened cocoa powder | 1 tablespoon | Chocolate undertones |
| Baking soda | 1/4 teaspoon | Leavening agent |
| Salt | Pinch | Flavor enhancement |
| Buttermilk | 3 tablespoons | Tangy flavor and tenderness |
| Vegetable oil | 2 tablespoons | Moisture and richness |
| Red food coloring | 1-2 teaspoons | Signature red color |
| Vanilla extract | 1/2 teaspoon | Aromatic depth |
| White vinegar | 1/2 teaspoon | Chemical leavening reaction |
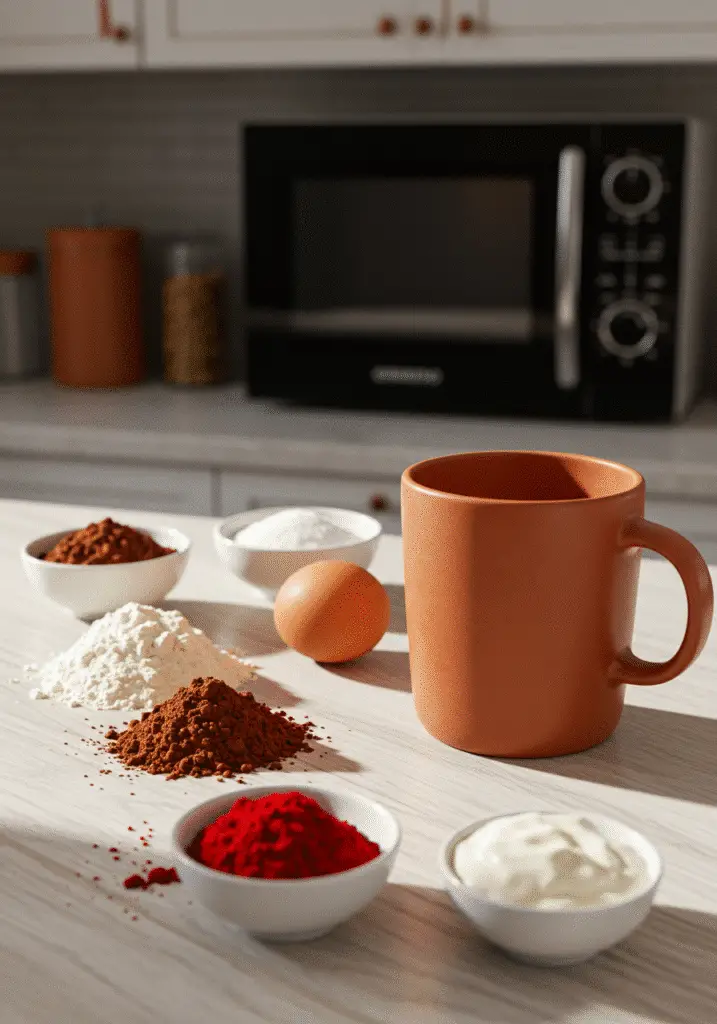
The secret to achieving that perfect moist red velvet mug cake lies in the precise balance of acidic and alkaline ingredients. Specifically, the buttermilk and vinegar work together to create the characteristic tang while activating the baking soda for optimal rise. Meanwhile, the small amount of cocoa powder provides subtle chocolate notes without overpowering the delicate vanilla flavor profile.
Mixing Method for Success
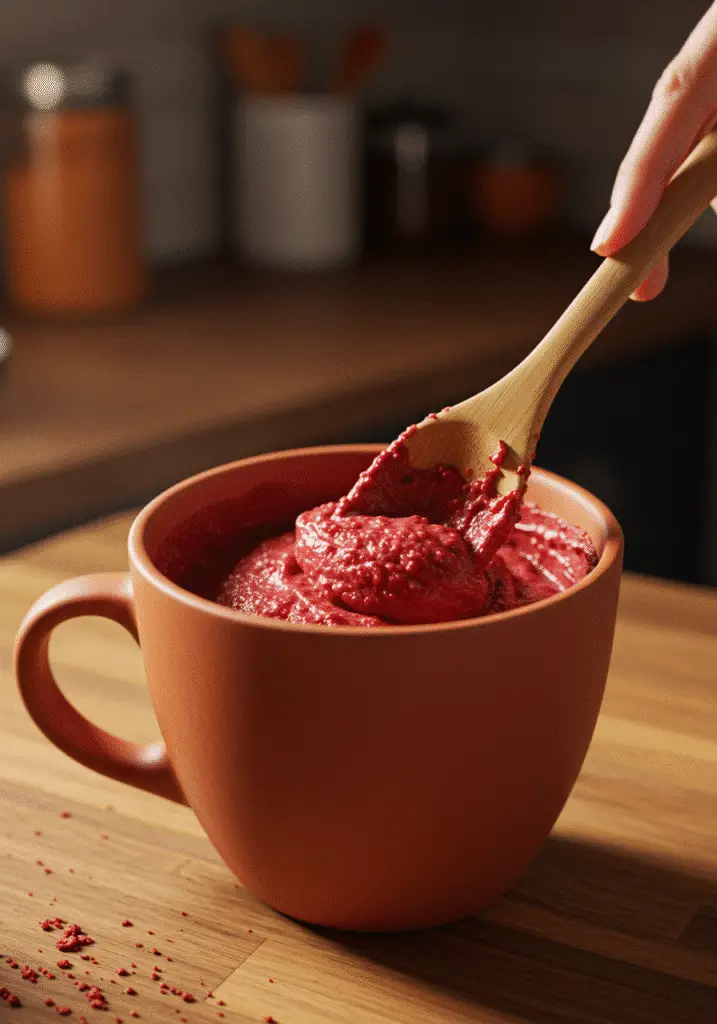
Creating the perfect microwave red velvet mug cake requires a specific mixing technique that ensures even distribution without overworking the batter. First, combine all dry ingredients in your microwave-safe mug, whisking thoroughly to eliminate lumps. Next, create a well in the center and add wet ingredients one at a time, stirring gently after each addition. This method prevents overmixing while ensuring complete incorporation, similar to techniques used in other delicate mug cakes.
The key difference between this and other red velvet mug cake recipes is the order of ingredient addition. Furthermore, by adding the food coloring with the wet ingredients, you achieve more even color distribution throughout the batter. This technique also prevents the harsh streaking that can occur when food coloring is added too late in the mixing process.
Microwave Timing and Power Settings
Perfecting your quick red velvet mug cake requires understanding your microwave’s personality. Most standard microwaves cook this recipe optimally at 70% power for 90 seconds to 2 minutes. However, microwave wattages vary significantly, so start with shorter intervals and adjust accordingly. Additionally, the cake should spring back lightly when touched in the center, indicating it’s properly cooked without being overdone.
Unlike protein-heavy mug cakes that require gentler cooking, red velvet’s balanced ingredient profile handles standard microwave cooking well. Nevertheless, always err on the side of undercooking slightly, as residual heat continues the cooking process even after microwaving stops.
Perfecting Your Red Velvet Mug Cake Color and Flavor Profile
Achieving that signature vibrant red color in your red velvet mug cake requires more than just dumping food coloring into the batter. Instead, the secret lies in understanding how different factors affect both color intensity and flavor development in microwave cooking.
The most common question I receive about this red velvet mug cake recipe concerns color consistency. Initially, many bakers struggle with achieving that deep, rich red that makes red velvet so visually appealing. However, with the right techniques and understanding of how food coloring behaves in microwave environments, you’ll consistently create stunning results.
Professional bakers often use gel food coloring for its intensity and stability, but liquid coloring works perfectly well for microwave red velvet mug cake applications. Moreover, the key is using enough coloring to overcome the natural brown tones from cocoa powder while maintaining the delicate flavor balance that defines authentic red velvet.
Natural vs. Artificial Coloring Options
While traditional red velvet mug cake recipes rely on artificial red food coloring, health-conscious bakers often seek natural alternatives. Consequently, options like beet juice powder or natural red food coloring can substitute for artificial varieties, though they may produce slightly different color intensities. Additionally, these natural options sometimes impart subtle earthy flavors that complement the tangy red velvet profile beautifully.
When experimenting with natural colorings in your easy red velvet mug cake, start with smaller amounts and gradually increase until you achieve your desired shade. Furthermore, natural colorings may fade slightly during microwave cooking, so don’t be alarmed if the final result appears less vibrant than the raw batter. This phenomenon also occurs in other naturally colored mug cakes.
Balancing Cocoa and Vanilla Notes
The hallmark of exceptional red velvet mug cake lies in achieving the perfect balance between subtle chocolate undertones and prominent vanilla flavor. Unlike chocolate cakes that showcase cocoa prominently, red velvet uses just enough cocoa to provide depth without overwhelming the delicate vanilla base. Therefore, resist the temptation to add extra cocoa powder, as this shifts the flavor profile away from authentic red velvet territory.
Quality vanilla extract makes a noticeable difference in moist red velvet mug cake results. Specifically, pure vanilla extract provides complex flavor notes that artificial vanilla simply cannot match. Additionally, the alcohol in pure vanilla extract evaporates during microwave cooking, concentrating the vanilla flavor while eliminating any harsh alcohol notes.
The cream cheese tang that defines red velvet comes primarily from the buttermilk and vinegar combination rather than actual cream cheese in the cake itself. Consequently, this allows the cake to maintain its light texture while delivering that characteristic tangy finish. However, you can certainly top your finished red velvet mug cake with frosting for the complete experience, similar to how I enhance specialty mug cakes with complementary toppings.
Troubleshooting Common Color and Flavor Issues
Many bakers encounter frustrating color inconsistencies when creating their first red velvet microwave mug cake. Typically, these issues stem from ingredient temperature, mixing technique, or microwave power variations. First, ensure all ingredients reach room temperature before mixing, as cold buttermilk can cause color distribution problems. Next, mix thoroughly but gently to avoid breaking down the food coloring molecules.
If your red velvet mug cake tastes too acidic, you’ve likely added too much vinegar or used buttermilk that’s approaching expiration. Conversely, if the cake lacks that characteristic tang, increase the vinegar slightly in your next attempt. Remember, flavor balance in mug cakes requires more precision than traditional recipes due to the concentrated cooking method.
Advanced Techniques and Creative Red Velvet Mug Cake Variations
Once you’ve mastered the basic red velvet mug cake recipe, exploring creative variations opens up endless possibilities for customization. Therefore, let’s dive into advanced techniques that transform this simple dessert into gourmet experiences tailored to different dietary needs and flavor preferences.
The beauty of single serving red velvet cake lies in its adaptability for experimentation. Unlike full-sized cakes that require significant ingredient investments, mug cakes allow you to test flavor combinations and dietary modifications without waste or major time commitments. Consequently, you can perfect your variations before scaling up for special occasions.
Dietary Adaptations and Substitutions
Creating an eggless red velvet mug cake requires understanding how eggs function in traditional recipes and finding suitable replacements. Fortunately, this particular recipe doesn’t rely on eggs for structure, making substitutions relatively straightforward. Instead, you can use applesauce, mashed banana, or commercial egg replacers to achieve similar moisture and binding properties.
For those following gluten-free diets, gluten-free red velvet mug cake variations work beautifully with almond flour or gluten-free flour blends. However, these substitutions may require slight liquid adjustments to maintain the proper batter consistency. Additionally, gluten-free flours sometimes absorb moisture differently during microwave cooking, so monitor your timing carefully during initial attempts.
Vegan adaptations of this microwave red velvet mug cake require substituting both the buttermilk and any dairy-based toppings. Plant-based milks combined with lemon juice or vinegar create excellent buttermilk alternatives, while maintaining the acidic component essential for proper texture and flavor. Moreover, these substitutions often produce surprisingly authentic results that rival traditional versions, similar to successful adaptations I’ve developed for vegan mug cake recipes.
| Dietary Need | Substitution | Notes |
|---|---|---|
| Gluten-Free | Almond flour or GF blend | May need extra moisture |
| Eggless | 1 tbsp applesauce | Adds moisture and binding |
| Dairy-Free | Plant milk + vinegar | Maintains acidity |
| Low-Sugar | Stevia or monk fruit | Reduce liquid slightly |
Gourmet Flavor Enhancements
Elevating your red velvet mug cake variations involves understanding how different flavor additions complement the base recipe. For instance, adding cream cheese pieces directly to the batter creates pockets of tangy richness that intensify during microwave cooking. Similarly, white chocolate chips melt beautifully in the microwave environment, creating luxurious flavor contrast.
Advanced bakers often experiment with extract combinations in their moist red velvet mug cake creations. Specifically, combining vanilla with almond extract creates complexity without overwhelming the delicate red velvet profile. Furthermore, a tiny amount of coffee extract enhances the chocolate undertones while maintaining the signature flavor balance.
Texture variations add another dimension to quick red velvet mug cake experiences. Therefore, try swirling in cream cheese frosting before microwaving for a marbled effect, or sprinkle mini chocolate chips on top halfway through cooking for delightful textural contrast. These techniques work similarly to those I use in fruit-studded mug cakes.
Professional Presentation and Serving Suggestions
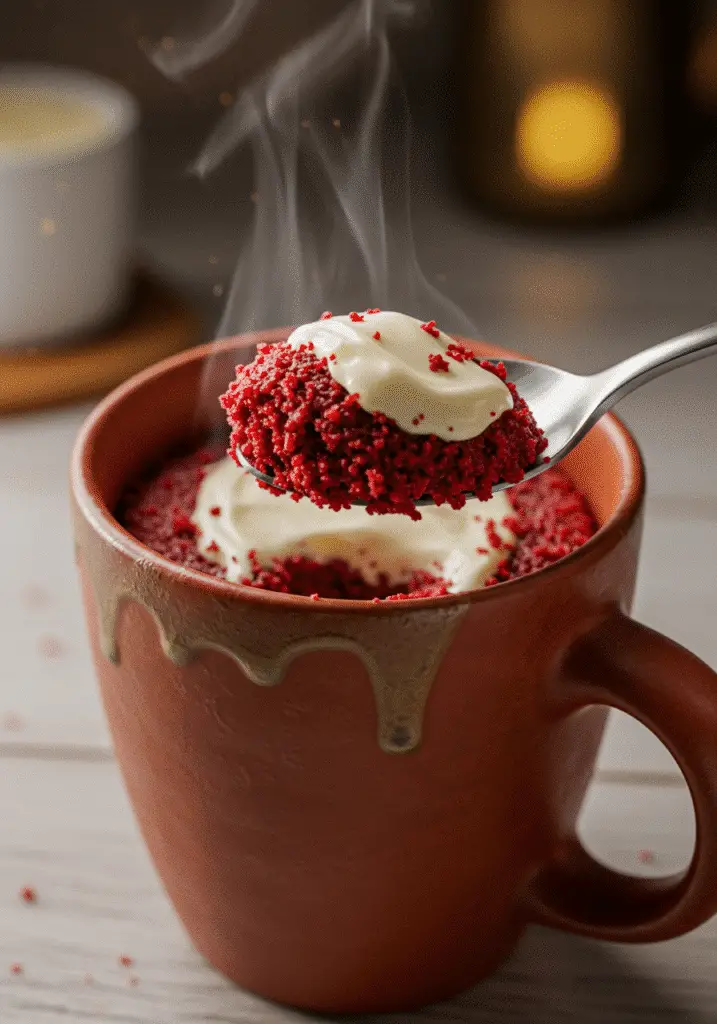
Transforming your red velvet mug cake with frosting from simple comfort food to restaurant-quality dessert requires attention to presentation details. First, allow the cake to cool for 2-3 minutes after microwaving, which improves both texture and safety. Next, consider inverting the cake onto a small plate for more elegant presentation, though this risks losing some moisture.
Cream cheese frosting remains the classic topping for red velvet mug cake, but modern variations include mascarpone whipped cream, vanilla bean ice cream, or even salted caramel drizzle. Additionally, garnishing with fresh berries or edible flowers creates Instagram-worthy presentations that showcase your culinary creativity.
For special occasions, consider creating red velvet mug cake parfait layers by alternating cake pieces with frosting and fresh fruit. This technique transforms the humble mug cake into an sophisticated dessert suitable for entertaining, proving that great desserts don’t require extensive preparation time or complicated techniques.
FAQs
How long do you cook a red velvet mug cake in the microwave?
Cook your red velvet mug cake for 90 seconds to 2 minutes at 70% power, depending on your microwave’s wattage. Start with 90 seconds and check for doneness – the cake should spring back lightly when touched in the center. If needed, continue cooking in 15-second intervals until properly set.
What ingredients are needed for a red velvet mug cake?
Essential ingredients include 4 tbsp flour, 3 tbsp sugar, 1 tbsp cocoa powder, 1/4 tsp baking soda, 3 tbsp buttermilk, 2 tbsp oil, 1-2 tsp red food coloring, 1/2 tsp vanilla, 1/2 tsp vinegar, and a pinch of salt. These simple pantry staples create the perfect balance of flavor and texture.
Can you make red velvet mug cake without eggs?
Yes! This red velvet mug cake recipe is naturally eggless, making it perfect for those with egg allergies or dietary restrictions. The combination of buttermilk, vinegar, and baking soda provides all the leavening and moisture needed for a fluffy, tender cake without eggs.
How do you get that vibrant red color in a red velvet mug cake?
Use 1-2 teaspoons of red food coloring mixed with the wet ingredients for even distribution. Gel food coloring produces more vibrant results than liquid, but both work well. The key is using enough coloring to overcome the brown tones from cocoa powder while maintaining the delicate flavor balance.
How do you make red velvet mug cake moist and fluffy?
The secret to moist, fluffy red velvet mug cake lies in the buttermilk and vinegar combination, which creates chemical leavening with the baking soda. Don’t overmix the batter, cook at 70% power to prevent overcooking, and let it rest 2-3 minutes after microwaving for optimal texture.
Can you add frosting or toppings to a red velvet mug cake?
Absolutely! Classic cream cheese frosting is traditional, but you can also top with whipped cream, vanilla ice cream, fresh berries, or chocolate chips. For best results, let the cake cool for 2-3 minutes before adding toppings to prevent melting.
How do you avoid a dry or rubbery red velvet mug cake?
Prevent dry, rubbery texture by using 70% microwave power instead of full power, avoiding overmixing the batter, and not overcooking. Start with shorter cooking times and add more if needed. The cake should be just set in the center when done – it continues cooking from residual heat.

Conclusion
This red velvet mug cake recipe proves that incredible desserts don’t require hours of preparation or professional baking skills. In just 90 seconds, you can create a perfectly portioned treat that captures every element that makes red velvet cake beloved worldwide. Whether you’re satisfying a midnight craving or impressing guests with a quick dessert, this microwave red velvet mug cake delivers consistent results every time.
The beauty of mastering this easy red velvet mug cake extends beyond the immediate gratification of warm, delicious cake. Furthermore, it opens doors to countless variations and customizations that suit every dietary need and flavor preference. From eggless red velvet mug cake adaptations to creative topping combinations, you’ll never run out of ways to make this recipe your own.
Remember, great cooking comes from understanding your ingredients and techniques, not expensive equipment or complicated procedures. This single serving red velvet cake exemplifies how microwave cooking can produce desserts that rival traditional oven-baked versions when you apply the right methods. Most importantly, don’t be afraid to experiment with the tips and variations I’ve shared—cooking should always be an adventure, especially when the results are this delicious.
So grab your favorite mug, gather these simple ingredients, and treat yourself to the magic of red velvet mug cake. In less time than it takes to preheat a conventional oven, you’ll be enjoying a warm, perfectly spiced, gorgeously red dessert that’s made just for you. Happy baking!
Connect with me for more microwave magic: Facebook | Pinterest
Print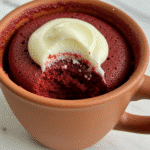
Red Velvet Mug Cake Recipe: Perfect Single-Serving Dessert in 90 Seconds
- Prep Time: 3
- Cook Time: 2
- Total Time: 5
- Yield: 1 1x
- Category: Dessert
- Method: Microwave
- Cuisine: American
Description
This easy red velvet mug cake delivers all the classic flavors of traditional red velvet cake in a single serving that’s ready in just 90 seconds. With its signature tangy-sweet taste and gorgeous crimson color, this microwave red velvet mug cake is perfect for satisfying dessert cravings without the fuss of a full-sized cake.
Ingredients
4 tablespoons all-purpose flour
3 tablespoons granulated sugar
1 tablespoon unsweetened cocoa powder
1/4 teaspoon baking soda
Pinch of salt
3 tablespoons buttermilk
2 tablespoons vegetable oil
1–2 teaspoons red food coloring
1/2 teaspoon vanilla extract
1/2 teaspoon white vinegar
Instructions
1. In a microwave-safe mug, whisk together flour, sugar, cocoa powder, baking soda, and salt until well combined
2. Create a well in the center of the dry ingredients
3. In a small bowl, mix buttermilk, oil, red food coloring, vanilla, and vinegar
4. Pour wet ingredients into the dry ingredients and stir gently until just combined (don’t overmix)
5. Microwave at 70% power for 90 seconds to 2 minutes, checking after 90 seconds
6. Let cool for 2-3 minutes before serving
7. Top with cream cheese frosting, whipped cream, or your favorite toppings if desired
Notes
For best results, use gel food coloring for more vibrant color
Don’t overmix the batter to avoid a tough texture
Microwave power varies, so start with less time and add more if needed
The cake should spring back lightly when touched in the center
Let cool slightly before eating as it will be very hot
Store leftovers covered for up to 2 days
Nutrition
- Serving Size: 1
- Calories: 285
- Sugar: 24g
- Sodium: 180mg
- Fat: 12g
- Saturated Fat: 2g
- Unsaturated Fat: 10g
- Trans Fat: 0g
- Carbohydrates: 42g
- Fiber: 2g
- Protein: 4g
- Cholesterol: 2mg

