Craving something sweet but don’t want to bake an entire cake? This Oreo mug cake transforms your microwave into a dessert powerhouse in just two minutes. Whether you’re following the viral TikTok Oreo mug cake trend or simply need a quick comfort treat, this recipe delivers perfectly moist, chocolatey goodness every single time. Plus, you’ll discover multiple variations from the classic two-ingredient Oreo mug cake to enhanced three and four-ingredient versions that’ll satisfy any sweet tooth. From troubleshooting common texture issues to creative topping ideas, everything you need for Oreo mug cake success awaits right here in your own kitchen.
Hey! I’m Emma, a 37-year-old home cook from Asheville, NC, here for all you busy bees who crave something warm, tasty, and made in a mug. My journey started with late nights, tight budgets, and a microwave I used more than my coffee maker. One failed pasta sauce (RIP saucepan) led me to the world of microwave mug meals—quick, creative, and shockingly satisfying. From breakfast scrambles to fudgy brownies, I’ve made it all in a mug, often with a toddler nearby or the dog barking at shadows. Great food doesn’t need fancy tools—just curiosity, a microwave, and maybe your favorite playlist. Let’s zap, stir, and savor one mug at a time!
Table of Contents
The Ultimate Guide to Oreo Mug Cake Basics
What Makes the Perfect Oreo Mug Cake
Creating an exceptional Oreo mug cake starts with understanding the fundamentals. Unlike traditional baking, microwave mug cakes require precise ratios and timing to achieve that perfect texture. The beauty of this Oreo mug cake recipe lies in its simplicity – you can make it with as few as two ingredients or enhance it with additional elements for extra richness.
The secret to success involves crushing your Oreos to the right consistency. Furthermore, the liquid ratio determines whether you’ll end up with a dense, fudgy cake or a lighter, fluffier texture. Most importantly, microwave power varies significantly between models, so you’ll need to adjust cooking times accordingly. Start with shorter intervals and gradually increase until you achieve your desired doneness.
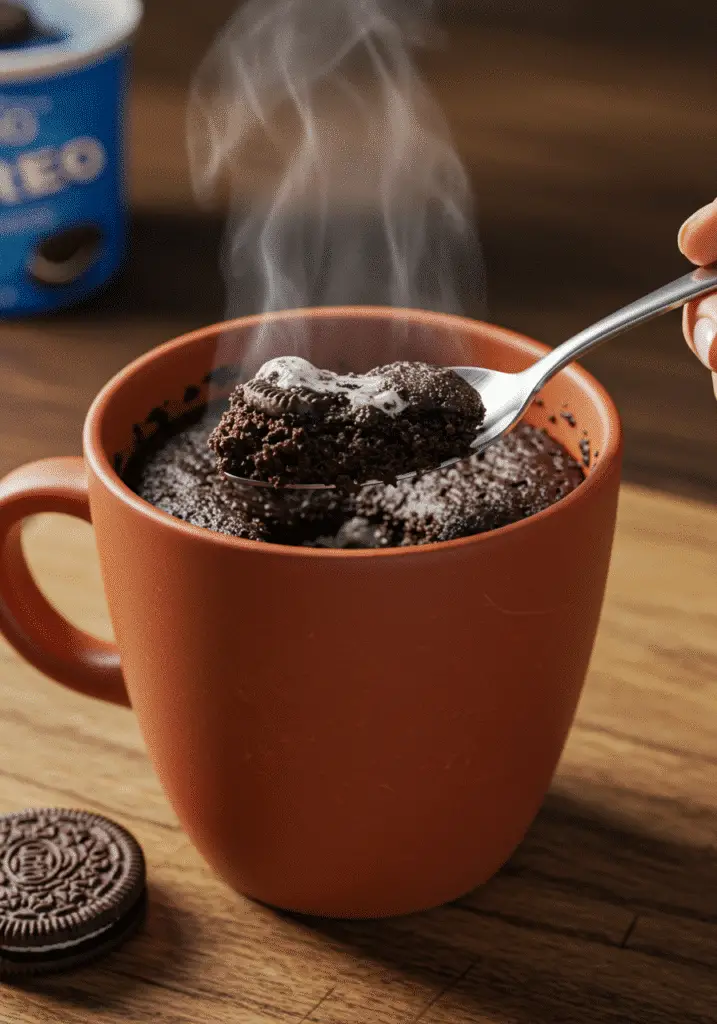
Temperature control plays a crucial role in preventing the rubbery texture that plagues many microwave desserts. Additionally, letting your Oreo mug cake rest for 30 seconds after microwaving allows the heat to distribute evenly throughout. This technique, which I learned while perfecting my chocolate mug cake, ensures consistent results every time.

Essential Ingredients for Oreo Mug Cake Success
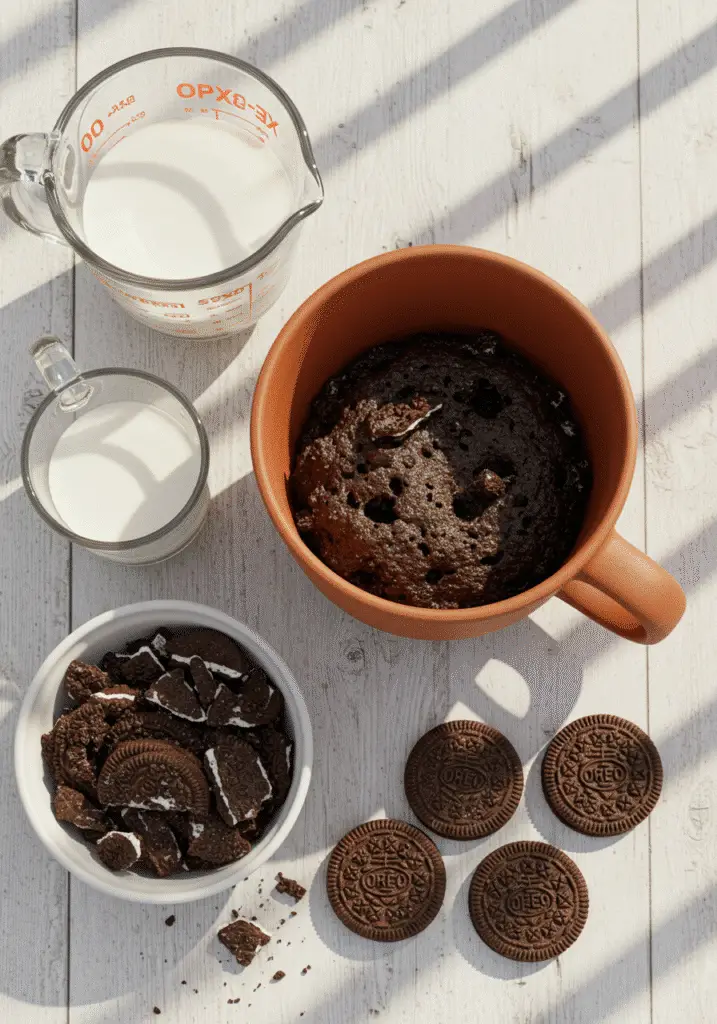
The most basic two-ingredient Oreo mug cake requires only crushed Oreos and milk. However, upgrading to a three-ingredient Oreo mug cake with the addition of a beaten egg creates a more cake-like texture. For those seeking ultimate indulgence, the four-ingredient Oreo mug cake includes melted butter for extra richness and moisture.
Quality matters when selecting your Oreos – regular chocolate sandwich cookies work perfectly, though you can experiment with different flavors. Moreover, whole milk produces the creamiest results, but alternatives like oat milk or almond milk work well for dietary restrictions. The key lies in maintaining the proper wet-to-dry ingredient ratio regardless of your chosen variations.
Temperature considerations extend to your ingredients as well. Cold milk straight from the refrigerator can create uneven cooking, so consider letting it reach room temperature first. Similarly, when making variations like my birthday mug cake, ingredient temperature affects the final texture significantly.
Making the Perfect Oreo Mug Cake in Your Microwave
Step-by-Step Oreo Mug Cake Instructions
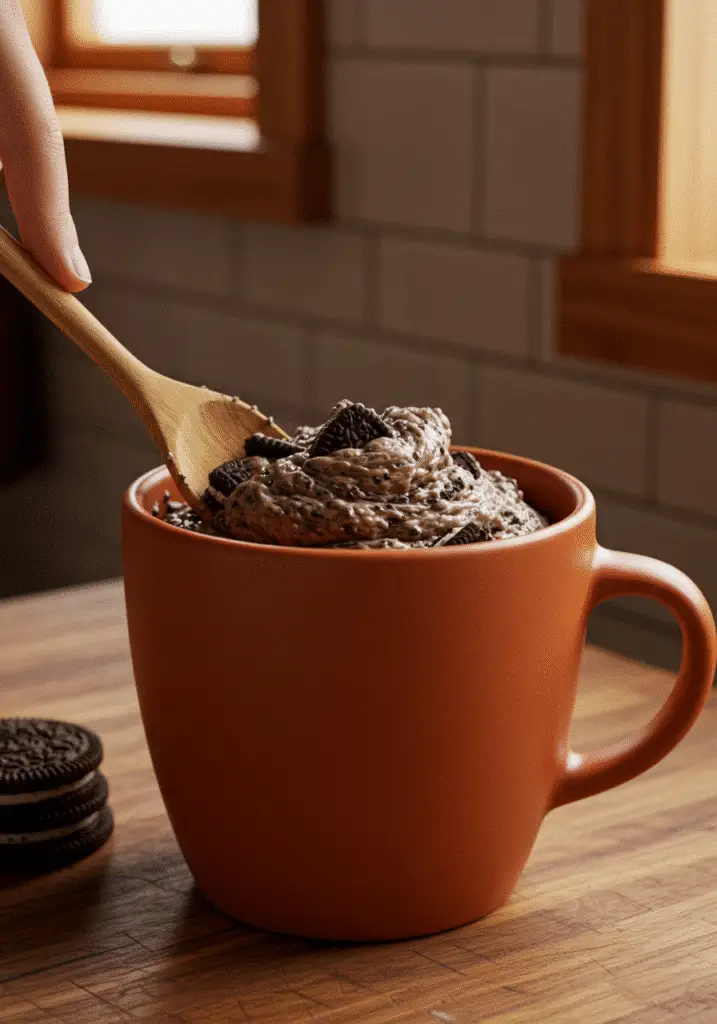
Begin your Oreo mug cake microwave adventure by selecting a microwave-safe ceramic mug. Crush 6-8 Oreo cookies until you achieve a mixture of fine crumbs and small chunks – this variation in texture creates interesting bite experiences. Transfer the crushed cookies to your mug, then gradually add 2-3 tablespoons of milk while stirring constantly.
The mixing technique significantly impacts your final result. Stir gently but thoroughly, ensuring no dry pockets remain while avoiding overmixing, which can lead to a tough texture. For enhanced flavor, try adding a pinch of vanilla extract or a tablespoon of chocolate chips. These additions work beautifully in other recipes like my coffee cake mug cake as well.

Microwave timing varies based on your appliance’s wattage. Start with 60 seconds for high-powered microwaves (1000+ watts) or 90 seconds for lower-powered units. The Oreo mug cake is ready when the center springs back lightly when touched. Remember, it continues cooking from residual heat even after removal, so slightly underdone is better than overcooked.
Perfecting Your Oreo Mug Cake Texture
Achieving the ideal Oreo mug cake texture requires attention to detail throughout the process. The consistency should resemble thick brownie batter before microwaving – not too thin that it becomes soup-like, yet not so thick that it won’t cook evenly. If your mixture appears too dry, add milk one teaspoon at a time until you reach the proper consistency.
Overcooking remains the most common mistake when making any Oreo mug cake recipe. The cake transforms from perfectly moist to disappointingly rubbery within seconds. Therefore, always err on the side of caution and check doneness frequently during the final 15-20 seconds of cooking time.
Altitude affects microwave cooking just as it does traditional baking. At higher elevations, you may need to reduce cooking time slightly and increase liquid content. This principle applies to other microwave recipes too, such as my popular lemon mug cake that readers love for its bright, citrusy flavor.
Oreo Mug Cake Variations and Creative Topping Ideas
Exploring Different Oreo Mug Cake Flavors
The versatility of Oreo mug cake variations allows for endless creativity in your kitchen. Golden Oreo mug cake offers a vanilla-forward flavor profile that pairs beautifully with fresh berries or a drizzle of caramel sauce. Additionally, mint Oreos create a refreshing twist perfect for after-dinner treats, while peanut butter Oreos deliver rich, nutty complexity.
Seasonal variations keep this recipe exciting year-round. During fall, try using pumpkin spice Oreos with a dollop of whipped cream. Winter calls for peppermint bark Oreos topped with crushed candy canes. Spring brings strawberry Oreos that complement fresh fruit, while summer features s’mores Oreos for that campfire feeling indoors.

International Oreo flavors open up even more possibilities for your Oreo mug cake toppings. Green tea Oreos create an elegant dessert when paired with vanilla ice cream, while red velvet Oreos make stunning presentations topped with cream cheese frosting. These creative approaches work wonderfully with other single-serving desserts like my vegan mug cake for plant-based alternatives.
Pro Tips for Oreo Mug Cake Excellence
Professional-level Oreo mug cake tips elevate your dessert from good to extraordinary. First, always grease your mug lightly with butter or cooking spray to prevent sticking – this small step makes serving much easier. Second, create a small well in the center of your batter before microwaving to promote even cooking throughout.
Temperature management extends beyond cooking time. Allow your Oreo mug cake to cool for 60 seconds before adding cold toppings like ice cream, which prevents immediate melting while maintaining the warm cake base. For enhanced presentation, dust the finished cake with powdered sugar or drizzle with melted chocolate.
Storage techniques matter even for single-serving desserts. While Oreo mug cakes taste best fresh, you can prepare the dry ingredients in advance and store them in sealed containers. This meal prep approach works excellently for busy weeknights and mirrors the convenience I’ve found with make-ahead recipes like my protein pancake in a mug.
Troubleshooting Common Oreo Mug Cake Problems
Solving Oreo Mug Cake Texture Issues
When your Oreo mug cake turns out rubbery, overcooking is usually the culprit. This texture develops when proteins in the milk and any eggs become overcooked and tough. To prevent this issue, reduce your microwave time by 15-second intervals until you find your appliance’s sweet spot. Remember, residual heat continues cooking the cake even after removal.
Conversely, undercooked Oreo mug cakes present as soggy or gooey in the center. While some people enjoy this fudgy texture, others prefer a more traditional cake consistency. If your cake needs additional cooking, microwave in 10-second bursts while checking doneness between intervals to avoid overcorrection.
Uneven cooking often results from ingredient distribution problems. Make sure to break up any large Oreo chunks and stir thoroughly to eliminate dry pockets. Additionally, using a wider, shorter mug rather than a tall, narrow one promotes more even heat distribution throughout your Oreo mug cake microwave creation.

Storage and Reheating Your Oreo Mug Cake
While Oreo mug cakes taste best immediately after preparation, proper storage extends their enjoyment. Cover cooled cakes tightly with plastic wrap and refrigerate for up to two days. The texture changes slightly but remains delicious, especially when reheated properly.
Reheating requires gentle heat to prevent toughening. Use 15-second microwave intervals at 50% power, checking between each interval until warmed through. Alternatively, allow refrigerated cakes to come to room temperature naturally, which takes about 30 minutes but preserves the optimal texture.
For longer storage, wrap individual Oreo mug cakes in aluminum foil and freeze for up to one month. Thaw overnight in the refrigerator, then reheat gently. This storage method works particularly well for meal prep enthusiasts who enjoy having desserts ready, similar to how I prepare batches of blueberry muffin mug cake for busy weeks.
Oreo Mug Cake Recipe
What do you need for an Oreo mug cake?
For a basic Oreo mug cake, you only need 6-8 crushed Oreo cookies and 2-3 tablespoons of milk. For enhanced versions, add a beaten egg for fluffier texture or melted butter for extra richness. The beauty of this recipe lies in its simplicity – you can make it with just two ingredients or customize with additional flavors.
Which flour is used in Oreo mug cake?
Traditional Oreo mug cake recipes don’t require additional flour since the crushed Oreo cookies provide the necessary structure and binding. The cookie crumbs act as both the flour and flavoring agent. If you prefer a more cake-like texture, you can add 1-2 tablespoons of all-purpose flour, but it’s completely optional.
Can I put Oreos in the microwave?
Yes, you can safely microwave Oreos when making mug cakes. The cookies soften and blend with other ingredients to create a cake-like texture. However, avoid microwaving whole Oreos alone as they can become extremely hot and potentially burn. Always crush them first and combine with liquid ingredients for best results.
How to make 2 ingredient Oreo cake?
Crush 6-8 Oreo cookies and mix with 2-3 tablespoons of milk in a microwave-safe mug. Stir until you achieve a thick batter consistency, then microwave for 60-90 seconds. The mixture should spring back lightly when touched in the center. Let it rest for 30 seconds before enjoying this simple yet delicious treat.
How long to microwave an Oreo mug cake?
Microwave your Oreo mug cake for 60-90 seconds, depending on your microwave’s wattage. High-powered microwaves (1000+ watts) typically need 60 seconds, while lower-powered units may require 90 seconds. Always start with less time and add 15-second intervals if needed to prevent overcooking.
Why is my Oreo mug cake rubbery?
A rubbery texture usually indicates overcooking. Microwave proteins become tough when exposed to too much heat. Reduce your cooking time by 15-second intervals and remember that residual heat continues cooking the cake after removal. Start with shorter cooking times and gradually increase until you find your microwave’s sweet spot.
Can I use different Oreo flavors in a mug cake?
Absolutely! Golden Oreos, mint Oreos, peanut butter Oreos, and seasonal flavors all work wonderfully in mug cakes. Each variety brings its unique flavor profile – Golden Oreos create vanilla-forward cakes, while mint Oreos offer refreshing after-dinner treats. Experiment with different combinations to find your favorites.
Can I store an Oreo mug cake?
While Oreo mug cakes taste best fresh, you can store them covered in the refrigerator for up to 2 days. Reheat gently using 15-second microwave intervals at 50% power. For longer storage, wrap in foil and freeze for up to one month. Always allow frozen cakes to thaw overnight before reheating.
Conclusion
This Oreo mug cake recipe proves that incredible desserts don’t require complicated techniques or extensive ingredient lists. Whether you choose the simple two-ingredient version or enhance it with eggs and butter, you’ll have a warm, satisfying treat ready in minutes. The versatility of this recipe means you can adapt it to any Oreo flavor or dietary preference while maintaining that perfect balance of convenience and indulgence.
Remember that practice makes perfect when mastering microwave timing for your specific appliance. Start with shorter cooking intervals and adjust based on your results. Most importantly, don’t be afraid to experiment with different Oreo mug cake variations and toppings to make this recipe uniquely yours. With these techniques and tips, you’ll never be more than two minutes away from dessert satisfaction.
Connect with me for more quick and delicious recipes:
Explore more mug recipes perfect for busy lifestyles: mac and cheese in a mug, microwave mug pizza, cinnamon roll in a mug, cottage cheese mug cake, and gluten-free mug cake for dietary alternatives.
Print
Oreo Mug Cake Recipe: 2-Minute Microwave Magic That Actually Works
- Prep Time: 2 minutes
- Cook Time: 2 minutes
- Total Time: 4 minutes
- Yield: 1 serving 1x
- Category: Dessert
- Method: Microwave
- Cuisine: American
- Diet: Vegetarian
Description
This incredibly easy Oreo mug cake transforms crushed cookies and milk into a warm, gooey dessert in just 2 minutes. Perfect for late-night cravings or when you need a quick single-serving treat that actually tastes amazing. The viral TikTok recipe everyone’s talking about!
Ingredients
6–8 Oreo cookies, crushed
2–3 tablespoons whole milk
1 large egg, beaten (optional)
1 tablespoon melted butter (optional)
Pinch of vanilla extract (optional)
Extra Oreo pieces for topping
Instructions
1. Crush Oreo cookies into a mix of fine crumbs and small chunks
2. Place crushed cookies in a microwave-safe ceramic mug
3. Gradually add milk while stirring until mixture reaches thick brownie batter consistency
4. Add beaten egg and melted butter if using for richer texture
5. Stir gently but thoroughly to eliminate dry pockets
6. Microwave for 60-90 seconds depending on your microwave’s wattage
7. Let rest for 30 seconds to allow heat to distribute evenly
8. Top with extra Oreo pieces, whipped cream, or ice cream if desired
Notes
Start with shorter microwave times and adjust based on your appliance
Cake is done when center springs back lightly when touched
Slightly underdone is better than overcooked
For variations, try different Oreo flavors like Golden, Mint, or Peanut Butter
Grease mug lightly to prevent sticking
Use a wide, shallow mug for more even cooking
Nutrition
- Serving Size: 1 mug cake
- Calories: 285
- Sugar: 24g
- Sodium: 320mg
- Fat: 12g
- Saturated Fat: 5g
- Unsaturated Fat: 6g
- Trans Fat: 0g
- Carbohydrates: 42g
- Fiber: 3g
- Protein: 6g
- Cholesterol: 45mg

